Things to drink when it’s hot outside

I am not a fan of summer.  Forty degree days, sunburn, public transport chaos, and sweating without even moving are just not my idea of fun.  I survive by staying indoors, closing all the blinds, sitting in front of the fan, and obsessively checking the Melbourne real time temperature update in hopes of a cool change.  Also drinking iced drinks.

Cold-brewed ice coffee

I can’t remember where I first encountered the idea – it was no doubt and excellent blog that I’m neglecting to credit.  Wherever it came from, it solved my coffee addict/heat despising dilema.

The idea with cold brewing (apart from not having to cool the brew down) is that you get all the flavour without the bitterness.  I have to say, it really works.  And it’s really simple.  Take a largish jug or other easy-to-pour from container, add a tablespoon of coffee per cup of water, and allow to steep for 12-24 hours.  Strain through a fine sieve or a colander lined with cheesecloth into another jug.  Serve sweetened or milked to your liking.  I like it with a teaspoon of dark agave, some Bonsoy, and lots of ice.

The same method can be used for tea as well, although I’d advise brewing for a shorter time to avoid it becoming too tannic.  I’m particularly fond of cold-brewed chai, again with agave and soy milk.

Lychee Slushie

Inspired by the drinks at countless dumpling houses, this couldn’t be simpler, and works well with just about any canned fruit.  Mangoes are my other favourite.  You can also turn these into an adult beverage by adding the white spirit of your choice.

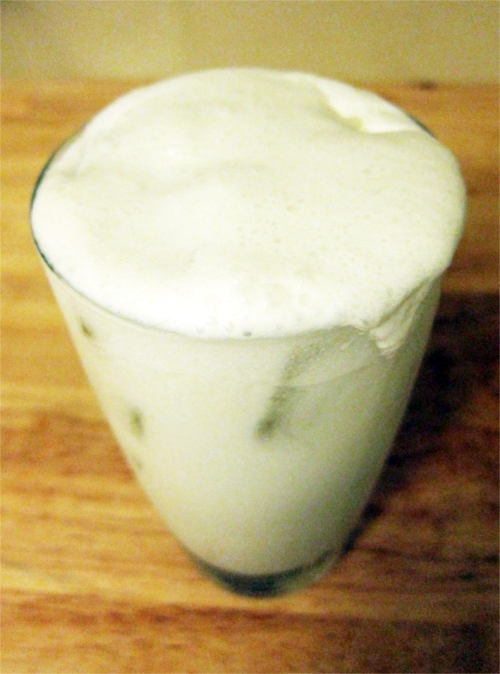
I use three trays of ice cubes to one large (560g) tin of lychees, which makes a little bit more than two of my glasses full.  Put the ice and lychees in a blender and blitz until they reach whatever consistency you like.  Pour into tall glasses and finish with a squeeze of lime.  Drink and be cool.

Pantry Pina Coladas

These aren’t ‘proper’ pina coladas by any means, but they are delicious and they get the job done and I usually have all the ingredients in my pantry, avoiding the necessity to leave the house and walk around in the heat. Much better to stay in and drink.

Fill your blender half full of ice.  Add a tin of coconut milk, a large tin of pineapple pieces (in syrup or juice according to your sweetness preference) and a good bit of white rum (again, according to your preference).  Blitz until the ice is crushed and the whole thing looks creamy and delicious.  Pour into glasses, drink, and be glad summer at least gives you an excuse to indulge.

Also be glad that, even though the fading light means your photos turn out badly, there should be a cool change coming soon.

Boilermaker Desert

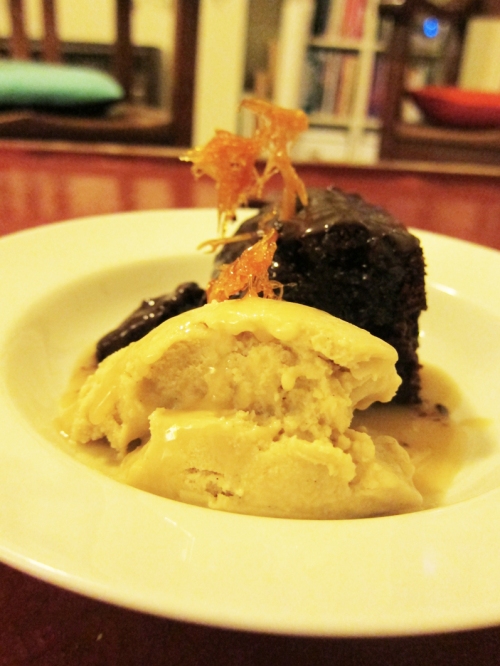
Chocolate stout cake.  Bourbon icecream.  Bourbon salted caramel sauce. Yes.

Chocolate stout cake with bourbon icecream and salted caramel sauce

Boilermaker desert

This is the kind of desert you make for someone you love.

You make it for them because their favourite drink is a boilermaker (beer with a chaser), and one wintery Melbourne evening while waiting for a tram you had a flash of brilliance and figured out how to translate that into desert form.

You make it for them because you’ve had that Chocolate Stout Cake  recipe bookmarked since forever and a very generous friend just gave you an icecream maker and this is the perfect excuse to try them both out.

You make it for them because they love you, too, and will forgive you when the whole centre of the cake collapses because you still haven’t quite figured out the quirks of your oven yet. And when you spin your decorative sugar strands too early and they collapse in the humidity of the kitchen and turn into strange chunks of toffee sculpture rather than the pretty, delicate nets you envisaged.

Probably they forgive you because this cake is still goddamn delicious, and it’s impossible not to love anyone who serves it to you.  Especially when they serve your favourite drink on the side:

Boilermaker

Chocolate stout and bourbon. Yes.

The cake recipe is from Smitten Kitchen.

The bourbon icecream and bourbon salted caramel sauce are from Ezra Pound Cake.

You should put them together and make this desert for someone you love.  Maybe that’s you?

Mushroom Rotolo

One of the things I love about where I live is that I’m just a few minutes walk from Carlisle Street’s abundant food choices.  One of the newer options is Ilona Staller, and I’m mighty pleased to have such a fancy local.  I end up eating there far too often – and far too much – for my budget, but in my defence it is really close and really good! They have a fairly short menu which changes regularly and always has a couple of good vegetarian options.  Recently, one of those options was a mushroom rotolo. I’d never heard of rotolo before, but I’m glad I have now.

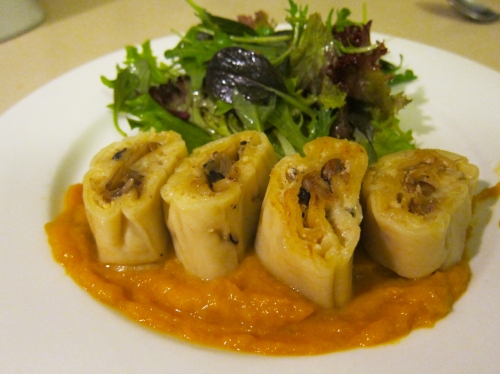
Mushroom Rotolo

Mushroom Rotolo

Rotolo is like a rolled lasagne which is poached and then sliced into thick rounds (did you know that already?).  The pasta was soft and comforting, the mushroom filling deeply flavoured, and there was lovely cheesyness. I liked it so much that I decided to make it myself as soon as I could. Like, the very next day.

I did a quick google search to get a sense of the method, but I pretty much made it up as I went along.  In an imitating-other-people’s-brilliance kinda way. And a made-a-lotta-lasagnes-in-my-life kinda way. The one essential thing I learned from the vast array of rotolo recipes on the internet was how to wrap the rolls cloth to poach them at the end.  The poaching avoids the hazard of dry lasagne, making the pasta soft and amazing.

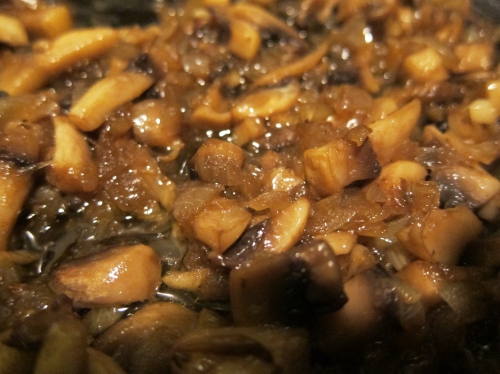
Cooking down the mushrooms

Look at those mushrooms!

The other trick is to add a bit of vegetarian mushroom ‘oyster’ sauce to the mushrooms.  I learned about it when Hanne Blank made me these vegan mushroom dumplings when I visited her in Baltimore at easter.  It adds an incredible deep mushroomyness that’s just amazing.

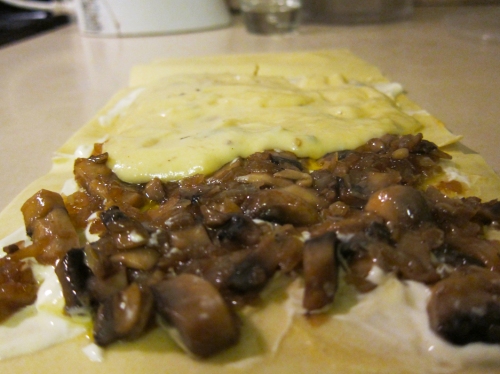
Assembling the rolls

Assembling the rolls

I also spread a slick of dijon mustard across the lasagne sheets before adding the other fillings. I’ve been a bit obsessed with this technique ever since I made Smitten Kitchen’s Cauliflower and Caramelised Onion Tart – it adds something subtle but amazing.  I also spread some Greek yoghurt over the mustard for a little extra tang (actually mostly because I wanted to use it up before it turned).  And it was good.

The whole thing was a bit of work for a weeknight dinner, but it’s not too onerous and it is utterly delicious.

Mushroom Rotolo

for the mushroom filling
small onion, finely chopped
500g mushrooms, finely chopped
2 cloves garlic, minced
a good sploosh of mushroom ‘oyster’ sauce

for the bechamel sauce
2 tablespoons butter
2 tablespoons flour
2 cup milk
1/2 cup grated cheese (whatever you have – parmesan is good, gruyere would be amazing, cheddar is perfectly fine)
a pinch of grated nutmeg
salt & pepper to taste

to assemble
4 fresh lasagne sheets
4 teaspoons mustard
4 tablespoons Greek yoghurt

Start with the mushrooms.  Heat some olive oil in a pan and add the onions.  Prod for a few minutes until they get a bit translucent, then add the mushrooms and garlic.  Cook over medium heat until everything softens up and turns a lovely caramel colour.  Add the mushroom sauce, season to taste, and set aside.

To make the bechamel sauce, melt the butter in a medium saucepan.  Add the flour and stir cook for a few minutes, stirring constantly.  Add the milk a little at a time, making sure it’s thoroughly incorporated before adding more.  Once all the milk has been added, cook over medium heat, stirring constantly, until the sauce starts to thicken.  Remove from heat, add the cheese, nutmeg, and seasoning.

To assemble, lay a lasagne sheet on your bench.  Spread a teaspoon of mustard over the top third.  Follow with a tablespoon of the yoghurt.  I spread the mushrooms over the the top two-thirds, then the bechamel a little further down so I got pure mushrooms in the centre, and cheese sauce holding the outside layers together.  Roll up the sheet and wrap tightly in muslin or a clean teatowel, making sure you secure the ends (a few good twists should do the job).

Carefully arrange the rolls in a large deep frypan or saucepan.  Pour in enough boiling water to just cover the rolls.  Cover and place the pan over medium heat – you want to just gently poach for around 15-20 minutes.

Once the rolls are done take them out of the pan, unwrap, and slice them into four or five thick slices.

I served mine on pumpkin mash because that’s what they did at Ilona Staller and I happened to have a chunk of pumpkin in the fridge, but you could also just spoon over a little bit of passata and call it delicious.

Mr Nice Guy

I’ve been a big fan of Mr Nice Guy cupcakes since my awesome friend Georgia introduced me to them.  My first Mr Nice Guy was some kind of amazing berry amazingness that was the perfect cupcake – light, moist cake with sweet-but-not-too-sweet flavoursome icing.  So as soon as Cindy & Michael posted about the new Mr Nice Guy Cafe in Brunswick (which happens to be a 10 minute walk from my office) I had to go.  Unfortunately, the cafe isn’t open on Tuesdays, so I had to wait a couple of days…and now it’s taken me a couple of weeks to write this up.

The cafe is at the Noise Bar on Albert St in Brunswick.  It’s full of couches and has a few ‘proper’ tables as well –  a blessing for those of use with a habit of spilling food in our laps.  It’s actually quite a charming space, although pretty quiet – I was the first person there when I walked in at 12:15, but a a couple of other groups came in while I was eating.

Along with the famous cupcakes, Mr Nice Guy also serve vegan tex mex and crepes. I had the quesadilla with vegan sour cream on the side ($2 extra) and it was damn tasty, although I wanted something more from it – a bit of fresh salsa would have made everything amazing.

I went specifically for lunch, but there was also no way I was leaving without a cupcake. I picked the Betty White: chocolate cake with coconut icing and flakes of toasted coconut on top – it’s like a bounty bar in cupcake form.

Betty White
Betty White – the Bounty bar of Vegan Cupcakes

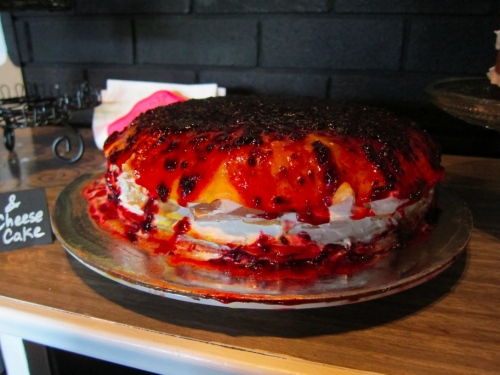
I took my camera along with full intentions of documenting my meal, but I got distracted by the tasty food and forgot all about it until I was paying (I took the cupcake photos once I got back to the office).  As I was fishing for my wallet, the amazing crepe cake below came out, and the owners were trying to figure out how to photograph it with dodgy phone cameras.  I offered to let them use my decent-but-not-very-fancy digital and emailed the photos.  This is the crepe cake:

Crepes layered with lemon cream cheese and glazed with berries.

As a thank you for the camera use, I got a bonus free cupcake! It was gorgeous – rosewater cake with a chocolate icing – so tasty!

Rosewater cupcake with chocolate icing

Bonus Cupcake: Rosewater with chocolate icing

The verdict: great space run with a complete lack of pretence, relaxed service, and tasty, tasty food.  I hope they get the custom they deserve and keep on serving up delicious vegan food to Brunswegians for a long, long, time.

Homemade “Ricotta”

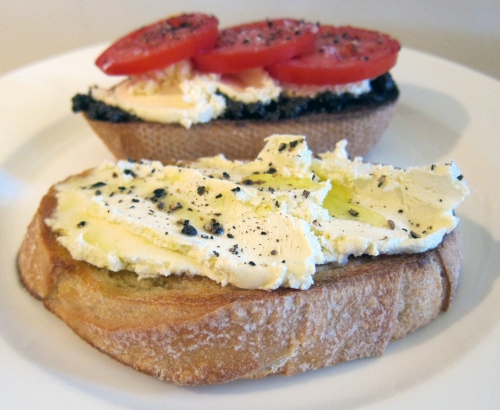
Homemade ricotta on toast

The first thing I have to say is that this isn’t really ricotta.  Ricotta is made from whey, and this is made from whole milk enriched with cream.  It’s like super-rich, lightly salted, fresh homemade paneer.  And it’s delicious.

The second thing I have to say is that I’m totally obsessed with it. I saw the recipe on Smitten Kitchen and I’ve made it three times now.  I kept forgetting to add the salt after the first batch, but I don’t think that takes too much away from it.  Seriously. So good.

The first time I followed Deb’s recipe exactly (opting for the lower cream:milk ratio; no idea why).  It was a little grainier than I’d like, but still delicious.  I mixed the fresh curds with some extra lemon juice and tossed with some just-steamed green beans and toasted almond flakes. Perfection.

The second time I made it to use up dairy products leftover from other recipes (I’m usually a soy kinda girl). I didn’t measure anything, just tipped the leftover milk and cream into a pot and heated it up.  I used leftover yoghurt for the acid, and when it didn’t curdle quite enough, I added a bit of extra lemon juice to get things going.  This was incredibly creamy, sweet, and amazing, and dear Maude I wish I’d measured things so I could repeat it. I scoffed it all with a spoon and you better believe I’m going to experiment with higher cream ratios and yoghurt coagulants until I can reliably reproduce the results.

The third time I made it, I decided to stop mucking around with polite quantities and just go for broke.  I made a-bit-over-double the original recipe with a cream ratio somewhere in between the two previous attempts.  I also miscalculated the acid ratio and used nearly twice the required lemon juice, but it still came out creamy and seriously good.  Better than deli ricotta for about two-thirds the price, and seriously better than supermarket tubs.  I keep sneaking back to the kitchen to eat it by the spoonful as I type.

If you don’t eat the whole lot at once, you have more restraint than me.  You should also transfer it to a plastic container and keep it in the fridge – it will keep for a few days (if it lasts that long).  It will also firm up a bit – mine ended up with a texture and mouthfeel similar to mascarpone.

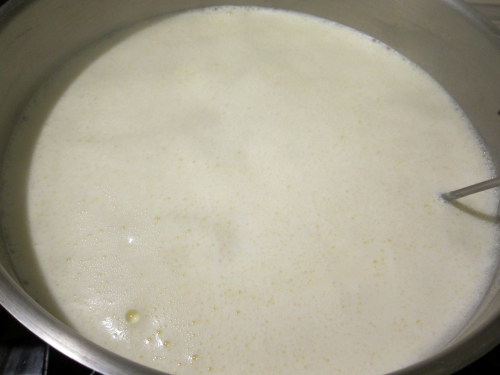
Hot milk

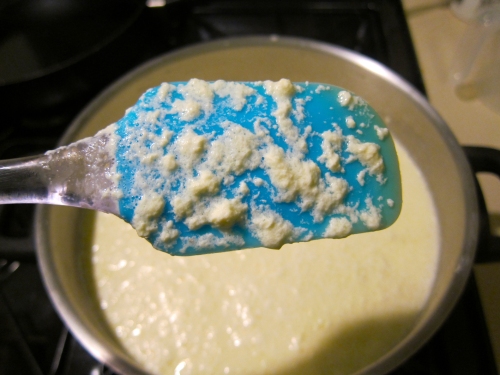
Heat the milk until it's foamy.

Mmm, curdled

Curdled milk. This is what you want.

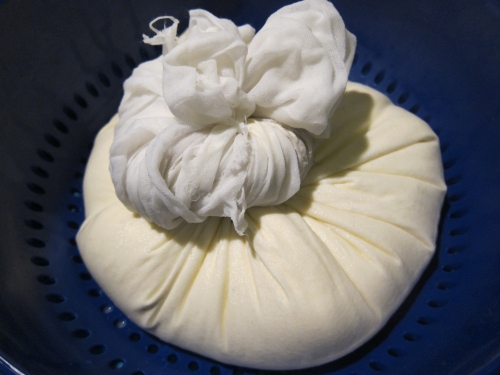
Cheesecloth. Ikea curtain. Whatever.

Homemade Ricotta
from Smitten Kitchen

If you’re after a more reasonable amount, you should probably go use Deb’s original recipe – but go for the higher cream content. Despite Deb’s claims, I think it makes a huge difference, but my experiments have not been as scientific as hers.  If you’re after an unreasonably large quantity, use the measures below. I guarantee you won’t regret it.

2L milk
600ml cream
pinch salt
150ml lemon juice (I used 300ml and it worked but had a very pronounced lemon flavour. Maybe have a couple extra lemons on hand in case?)
A couple of good pinches of salt

Combine the milk and cream (and salt! don’t forget the salt!) in a large saucepan.  Place over medium heat.  If you have a candy/deepfry thermometer, heat to 85C (190F).  If you don’t have a thermometer, heat until just below boiling (there will be foamy bubbles on the surface).

Turn off the heat.  Pour in the lemon juice and stir gently – you should see curds start to form.  If that doesn’t happen, add a little more lemon juice, 1 tablespoon at a time, until they do.  Leave to sit for a few minutes.

Place a large colander over a bowl.  Line the colander with cheesecloth (I use the excess length of a sheer curtain from Ikea, washed and cut to size.  You could also use a tea towel, but the closer the weave the longer it will take to drain.)

Allow to drain.  The longer you leave it, the drier it will be.  If you’re making the large quantity, you may need to empty the whey from the bowl every so often.

To eat: Spread on toast. Mix through pasta. Drizzle with olive oil. Drizzle with honey. Serve with fruit. Or tomatoes and basil.  Or just-steamed green beans and toasted almond flakes. Or grilled eggplant or zucchini or asparagus.  Or just grab a spoon and go for it. No judgement here.

Braised Celery & Potatoes

You guys, did you know that celery is, like, a real vegetable? That you can cook? As the main ingredient in a dish and not some tiny, background component? And it would be delicious? You did? Well, I didn’t until just now!

I still had a heap of veggie box celery left over after my Waldorf Salad efforts, and not having much of an idea what to do with it, I Googled “celery recipes” for inspiration. At the bottom of the page amongst the oh-so-helpful search suggestions was the phrase “braised celery recipes” and that was all I needed.  I may have even clicked on that phrase and flicked through a couple of the recipes, but I already knew what I was going to do.

The thing about braising celery is that it changes everything. There’s no bitterness, no stringiness, no aching jaw after all that crunchy.  Rather it melts into a tender, sweet-yet-deeply-savory deliciousness. I can’t quite explain it. You’ll just have to make it for yourself.

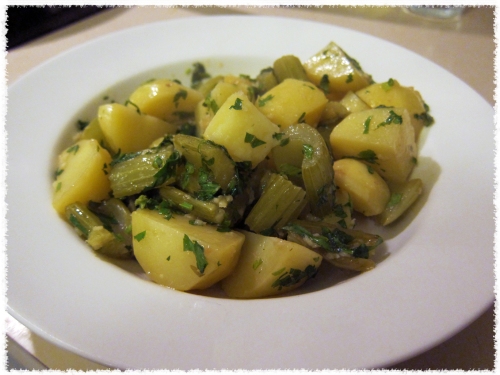
Braised Celery & Potatoes

Olive oil
1/2 bunch celery
4 medium potatoes (I like Dutch Cream)
2 cloves garlic, minced
1 cup white wine
1-2 cups vegetable stock
Juice of 1/2 lemon
Handful of chopped parsley

Wash the celery and chop into 1-inch lengths.  Heat a slug of olive oil in a large pan and cook the celery over medium-high heat, stirring occasionally, for 5 minutes.

Meanwhile, peel the potatoes and cut them into 1-inch chunks.  Add them to the pan along with a pinch of salt and cook a further 5 minutes.  Everything should colour up slightly.

Add the garlic and stir through, then pour in the wine and stir, scraping the bottom to get all the bits up.  Allow it to reduce a bit.  Add 1 cup of stock, cover and simmer, stirring occasionally.  Keep an eye on the liquid levels and add more if it’s getting dry before the potatoes are cooked.  The dish is done when the the potatoes are tender and almost all the liquid is gone, leaving a glossy coat all over everything.

Stir through the lemon juice and parsley.  Have a taste and season with salt and pepper.  Spoon out into big bowls, grab a fork, and get to know your celery in a whole new way.

Mushroom Bourguinon

One of the things I thought I’d really miss when I first went vegetarian was winter stews – slow-cooked, deeply flavoursome, alcohol-infused, meaty winter stews with thick, rich gravy.  It didn’t take me long to figure out some very satisfying vegetarian alternatives, but this mushroom bourguignon from Smitten Kitchen is one of the best by far.

As Deb says, “most of the things people thought they liked about meat they actually liked about the sauces and braises and spices they were cooked in” and I think this recipe proves that.  It’s rich, indulgent, warm, and comforting.  It’s everything you want it to be.  And it’s very easily veganisable – just replace the butter with olive oil and away you go.  Vegan French food win!

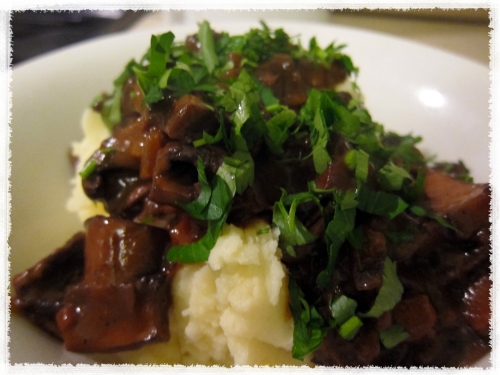
Deb serves her mushrooms over egg noodles, but I had mine with mashed potatoes and I’m calling it perfection. I did eat the leftovers with parpadelle the next day, and that was damn fine, too.  Just pick your favourite carb and get to it.

Mushroom bourguignon on mashed potatoes

Mushroom Bourguignon
Very slightly adapted from Smitten Kitchen 

4 tablespoons Olive oil or olive oil & butter
900g-1kg mushrooms (I used portabellos)
1/2 carrot, finely diced
1 small yellow onion, finely diced
1 teaspoon fresh thyme leaves
2 cloves garlic, minced
1 cup red wine
2 tablespoons tomato paste
2 cups vegetable stock
1 1/2 tablespoons plain flour
Parsley, chopped

Heat a good sploosh of olive oil, or a combination of olive oil and butter, in a large pan.  Cook the mushrooms on high until they colour, but don’t soften.  Remove from the pan and set aside.

Saute the onions, carrots and thyme over medium heat until the onions colour.  Season with salt and pepper.  Add the garlic and cook very briefly.

Pour in the wine and stir, scraping the stuck bits off the bottom.  Bring to the boil and allow the liquid to reduce by half.  Stir in the tomato paste and the stock.

Add the mushrooms and any liquid they released, and simmer for 15-20 minutes.

Mix the flour with 1 tblsp of butter or oil, then add to the stew.  Simmer over low heat for around 10 minutes, or until the sauce is a thick gravy.  Taste, season if necessary, and spoon over the carbohydrate of your choice.  Top with a good sprinkling of the chopped parsley, pour yourself a nice glass of red, and snuggle up near a heater while you eat.  You’ll wish winter would stay forever.

Waldorf Salad

Celery, you guize!

Celery

Look, it’s so green!  It’s also something I usually have no idea what to do with it when it arrives in my veggie box.

Probably because I used to hate it.

Celery was my most-despised vegetable growing up.  I thought it was bitter and stringy and I absolutely could not understand why anyone would insist on ruining perfectly good food with its presence.  My mother used to try to get me to eat it because of the allegedly magical weigh-loss effects it would have on my fat little body.  But even in those days of self-loathing, I couldn’t bring myself to eat it, no matter what the promised effects.

I grew up and my tastes changed (both in food and the best way to deal with living in a fat-hating culture).  I’d occasionally buy a stick of celery to put into pot of stock, or even a mirepoix. But it wasn’t until the last year or so that I’ve come to actually like the stuff (and even sometimes – shockingly! – crave it).  It’s so deeply associated with diet-culture in my mind, and it’s hard to enjoy any sort of food if you’re eating it as punishment.

Anyway, a lovely bright green half of celery turned up in my veggie box, and since my freezer is full of as much stock as it can hold, I needed to find another way to use it.  Also in my veggie box were some of the crispest, pinkest sweet-tart apples I’ve ever eaten.  The solution was obvious.

Waldorf Salad

I haven’t eaten a whole lot of Waldorf salads in my life (see above re childhood hatred of celery), and what few I have sampled tended to be drowned in overly sweet dressing.  Don’t do that.

This salad is crisp and crunchy. It makes a lot of noise in your mouth. It’s sweet and juicy and tangy and nutty.  It’s in-season. It’s refreshing.  It’s surprisingly satisfying. I want more.

Waldorf Salad
Serves 2

2 red apples (pink ladys are excellent)
3 stalks of celery
A couple of handfuls of walnut pieces
Half a bunch of parsley
Radicchio or other lettuce leaves (optional)

Dressing:
2-4 tblspns mayonaise (I used home-made aioli because I just happened to have some leftover, and the garlic was an excellent addition)
Juice of 1 lemon
1 tsp dijon mustard
salt & pepper

Combine all the  dressing ingredients in a jar, shake vigorously, taste, season and set aside.  You want the dressing to be tangy-but-creamy, thick-enough-to-coat-but-not-too-thick. You know, perfect.

Core the apples and chop into bite-sized pieces.
Finely slice the celery.
Chop the parsley.
Put them all into a bowl with the walnuts.
Pour over enough dressing to lightly coat everything without drowning it.

I hear the done thing is to serve this up on a bed of radicchio leaves, but I just ate it straight from the bowl. And it was delicious.

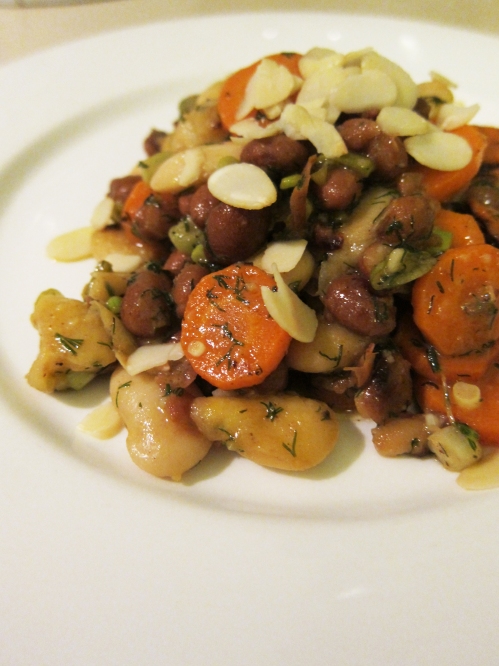
Warm Carrot & Bean Salad

This is a good salad.  A delicious salad.  A surprisingly hearty salad.  Well, maybe not that surprising, given the beans, but tasty and satisfying nonetheless.  It’s also a simple salad, easy to make and even easier to eat.  Try to leave some leftovers, though, because it’s pretty damn tasty the next day (though I’d recommend gently reheating in order to maximise the tastiness).

The recipe originally comes from 101 Cookbooks, and I made a few changes according to taste and what was in the pantry.  I added a lot more lemon juice because I love the zinginess.  I used two tins of beans, one large butter beans, the other borlotti because that’s what I had.  My carrots weren’t particularly young (but coming from my Greenline veggie box, they were characteristically sweet and delicious).  That is to say, it’s an adaptable salad as well.  Make it with whatever you have.  I promise it will be delicious.


Carrot & Bean Salad
from 101 Cookbooks

For the dressing:
1/4 cup olive oil
1 lemon, juiced
a good pinch of salt
3 shallots, thinly sliced

For the salad:
Olive oil
2-4 carrots, sliced
2 tins of white beans
1 bunch fresh dill, chopped
2 tblspns brown sugar
Sliced almonds (optional)

Mix together the dressing ingredients.  Taste, adjust seasoning if necessary, and set aside.

Put a largish pan over medium head. Add a good glug of olive oil, then add the carrots in a single layer.  Still occasionally until browned and softened.

Toss in the beans and the dill and continue cooking, stirring occasionally, until everything is heated through.

Tip the mixture into a large, heat-proof bowl.  Sprinkle with the sugar and about 3/4 of the dressing, and mix gently.  Let it sit for 10minutes or so to absorb the dressing and allow the flavours to mingle.  Add the rest of the dressing if necessary (or keep it aside to liven up any leftovers).  Sprinkle with flaked almonds if you’re using them.

Grab your fork and eat!

Vegan Pho

It’s cold in Melbourne.  I’ve been in the US for the last couple of months, and I’ve returned to a welcome-home dose of tonsilitis.  So I’ve been staying in, rugging up, and eating soup.  Specifically, pho, which is quite possibly the best soup ever invented. Rich and aromatic and spicy and delicious pho.

Pho is a Vietnamese noodle soup traditionally made with beef stock and flavoured with cinnamon and star anise. I find a rich mushroom stock to be an excellent veg*n alternative to beef, but if you’re pressed for time or just don’t feel like making stock from scratch, you can use any good vegetable stock.

I wasn’t going to post about it until I remembered to take some photos, but I’ve been talking about it on the twitters and had a few requests for the recipe, so here it is.  Pictures may come later.

Vegan Pho

For the broth:
1 litre of good vegetable stock
1 large onion, quartered
1-2 inch chunk of ginger,
1 cinnamon stick
2 star anise pods
3-4 cloves
1-2 tablespoons soy sauce

For substance:
Noodles
Tofu
Broccoli or other greens

For the garnishes:
Chilli
Lime
Coriander or Vietnamese Mint
Bean Shoots

Put a large pot over high heat.

Cut the ginger into 3-4 pieces and whacked with the side of the knife to bruise.  Add the onion and ginger to the pot and cook for around five minutes, until scorched and charred.

Turn the heat down to medium and add the spices. Toast the spices for 1-2 minutes, just until they become aromatic. Be very careful not to burn or everything will be bitter and ruined.

Add the stock, starting with a little at a time.  It will splutter against the hot pan, so be careful.  Bring to boil, reduce heat, cover and simmer for 20 minutes. Add 1-2 tablespoons of soy sauce, taste, and add more if you think it needs it.

Meanwhile, prep your other ingredients. Cube and fry the tofu. Prep the noodles according to packet directions. At the last minute, very lightly steam your greens.

Prep the garnishes. Finely chop the chilli, clean and pick the coriander or Vietnamese mint, cut the lime into wedges, and wash and trim the bean shoots.  Put them all in separate dishes ready to serve.

Your broth should be done by now – have a taste and adjust the seasoning if necessary.

Get a big bowl. Fill with noodles. Top with tofu and greens. Ladle over steaming hot pho broth. Serve with the garnishes on the side.  I recommend squeezing a metric tonne of lime juice over everything, but go easy on the chilli because it tends to sink to the bottom and get hotter as you go.

Eat and be happy.